Image Effects & Type
Enhance your images by adding a drop shadow, keyline, change transparency and make image adjustments.
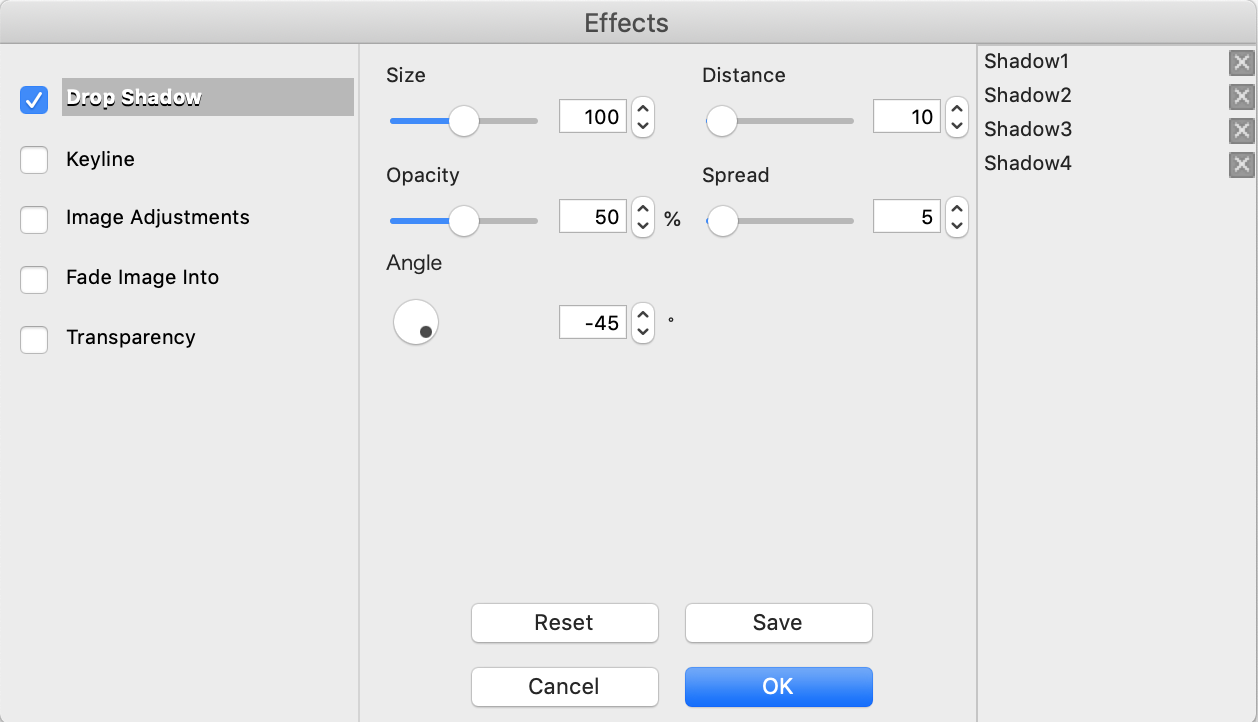
DROP SHADOW
Drop Shadow settings are available for diffusion size, opacity, angle, distance, and spread. You may also use the preset options or save your own custom settings.
Open Effects Window - Method 1
- Click on image to enhance.
- Click on Effects icon found at the center of the top menu bar.
- Right-click on image to enhance.
- Select Drop Shadow.
- Select Options.
- Click on checkbox to preview Drop Shadow effect.
- Choose from one of the presets or select custom settings.
- Click OK
- Click on checkbox to preview Drop Shadow effect.
- Choose from one of the presets or select custom settings.
- Click OK.
- Select image.
- Open Effects window via methods 1 or 2.
- Uncheck Drop Shadow.
- Click OK.
- Choose custom settings.
- Click on Save button.
- Name preset.
- Click OK.
- Select effect type.
- Click on x icon to the right of the preset or custom setting.
- Click on Save to delete and accept changes.
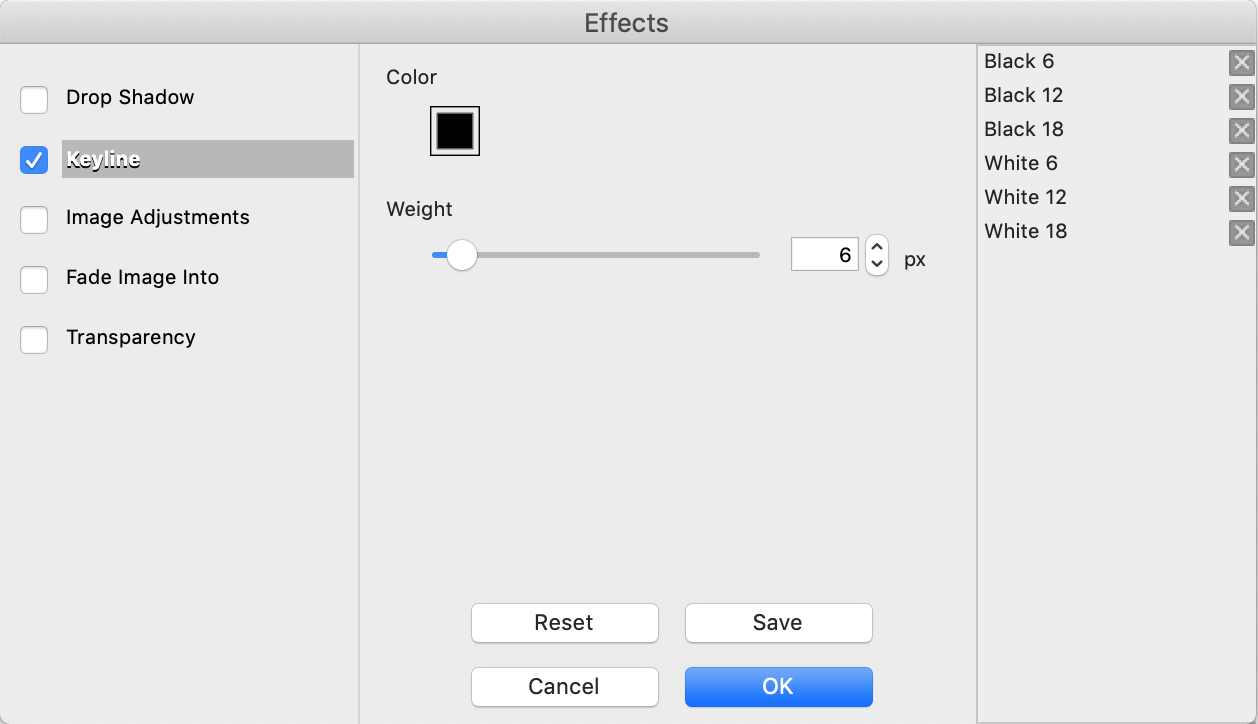
KEYLINE
A fine line border between 1 and 100 pixels can be added to frame an image, as well as changing the keyline color. You may also use the preset options or save your own custom settings.
Open Effects Window - Method 1
- Click on image to enhance.
- Click on Effects icon found at the center of the top menu bar.
- Right-click on image to enhance.
- Select Keyline.
- Select Options.
- Click on checkbox to preview Keyline effect.
- Choose from one of the presets or select custom settings.
- Click OK.
- Select image.
- Open Effects window via methods 1 or 2.
- Uncheck Keyline.
- Click OK.
- Choose custom settings.
- Click on Save button.
- Name preset.
- Click OK.
- Select effect type.
- Click on x icon to the right of the preset or custom setting.
- Click on Save to delete and accept changes.
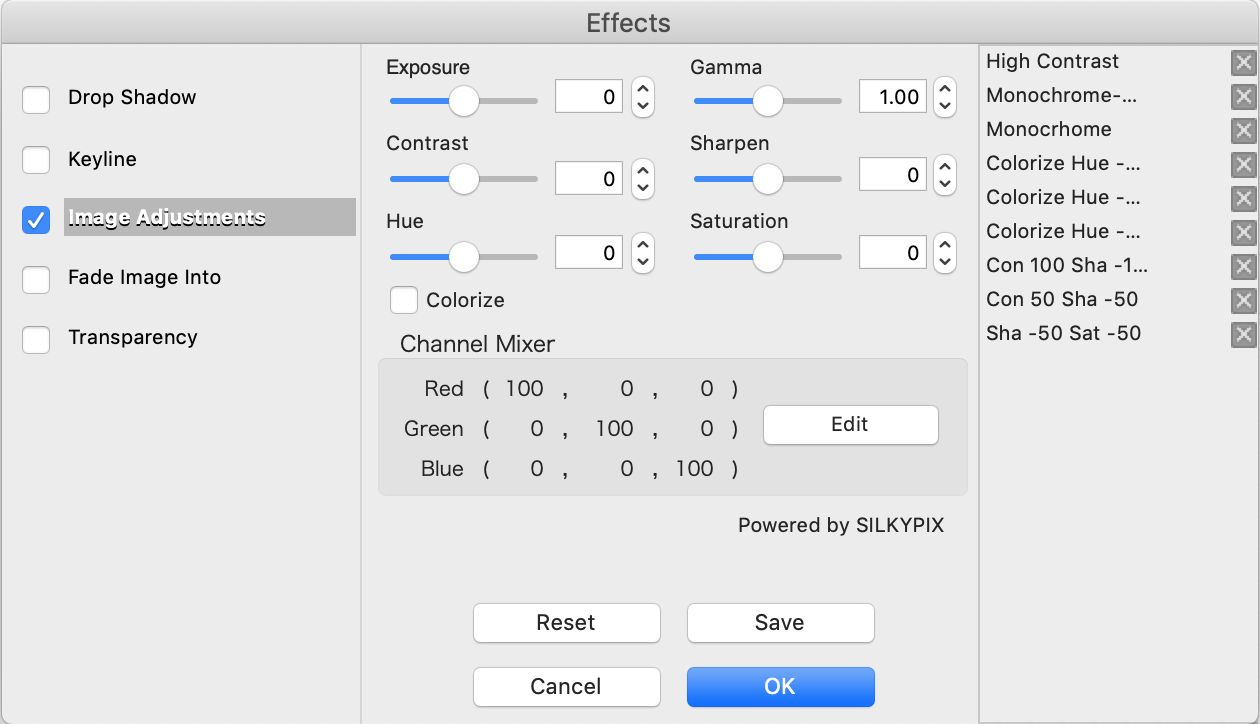
IMAGE ADJUSTMENTS
Select exposure, contrast, hue, gamma, sharpen, saturation, colorize, and/or use the Channel Mixer. You may also use the preset options or save your own custom settings.
Open Effects Window - Method 1
- Click on image to enhance.
- Click on Effects icon found at the center of the top menu bar.
- Right-click on image to enhance.
- Select Image Adjustments.
- Select Options.
- Click on checkbox to preview Image Adjustments effect.
- Choose from one of the presets or select custom settings.
- Click OK.
- Click on checkbox to preview Image Adjustments effect.
- Choose from one of the presets or select custom settings.
- Click OK.
- Select image.
- Open Effects window via methods 1 or 2.
- Uncheck Image Adjustments.
- Click OK.
- Choose custom settings.
- Click on Save button.
- Name preset.
- Click OK.
- Select effect type.
- Click on x icon to the right of the preset or custom setting.
- Click on Save to delete and accept changes.
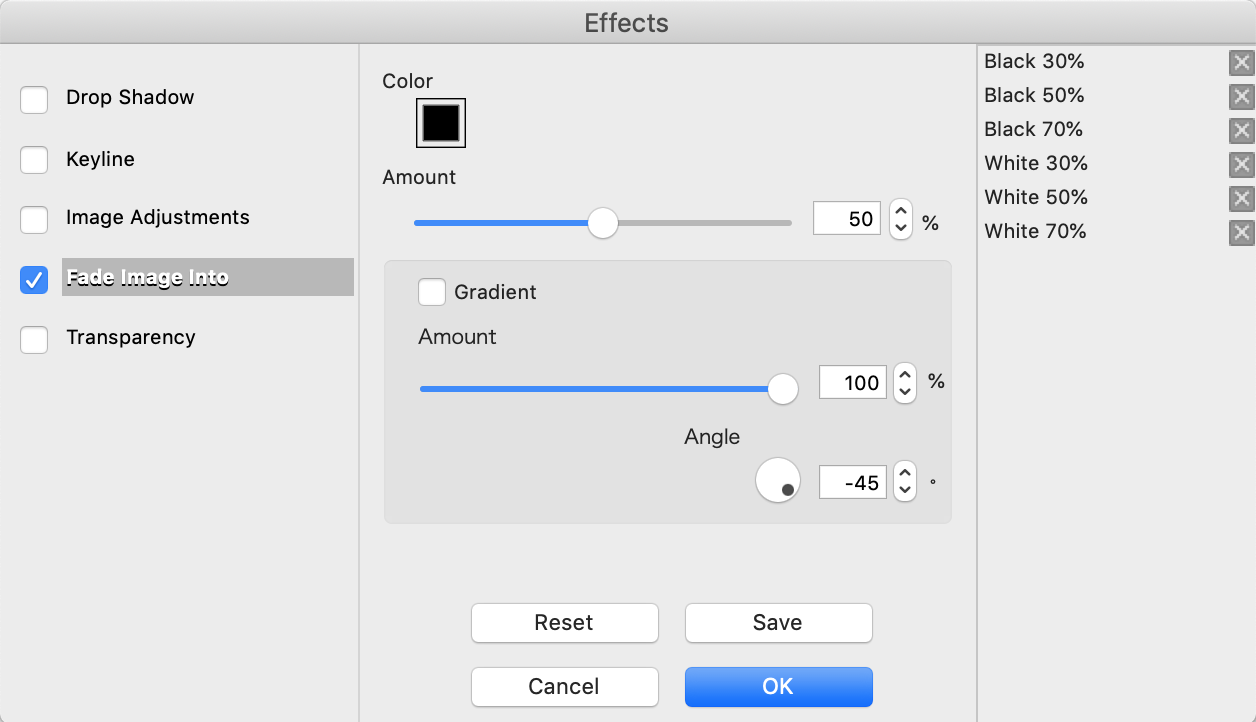
FADE IMAGE INTO
Add a color or gradient overlay, and change its opacity and color. You may also use the preset options or save your own custom settings.
Open Effects Window - Method 1
- Click on image to enhance.
- Click on Effects icon found at the center of the top menu bar.
- Right-click on image to enhance.
- Select Fade Image Into.
- Select Options.
- Click on checkbox to preview Fade Image Into effect.
- Choose from one of the presets or select custom settings.
- Click OK.
- Click on checkbox to preview Fade Image Into effect.
- Choose from one of the presets or select custom settings.
- Click OK.
- Select image.
- Open Effects window via methods 1 or 2.
- Uncheck Fade Image Into.
- Click OK.
- Choose custom settings.
- Click on Save button.
- Name preset.
- Click OK.
- Select effect type.
- Click on x icon to the right of the preset or custom setting.
- Click on Save to delete and accept changes.
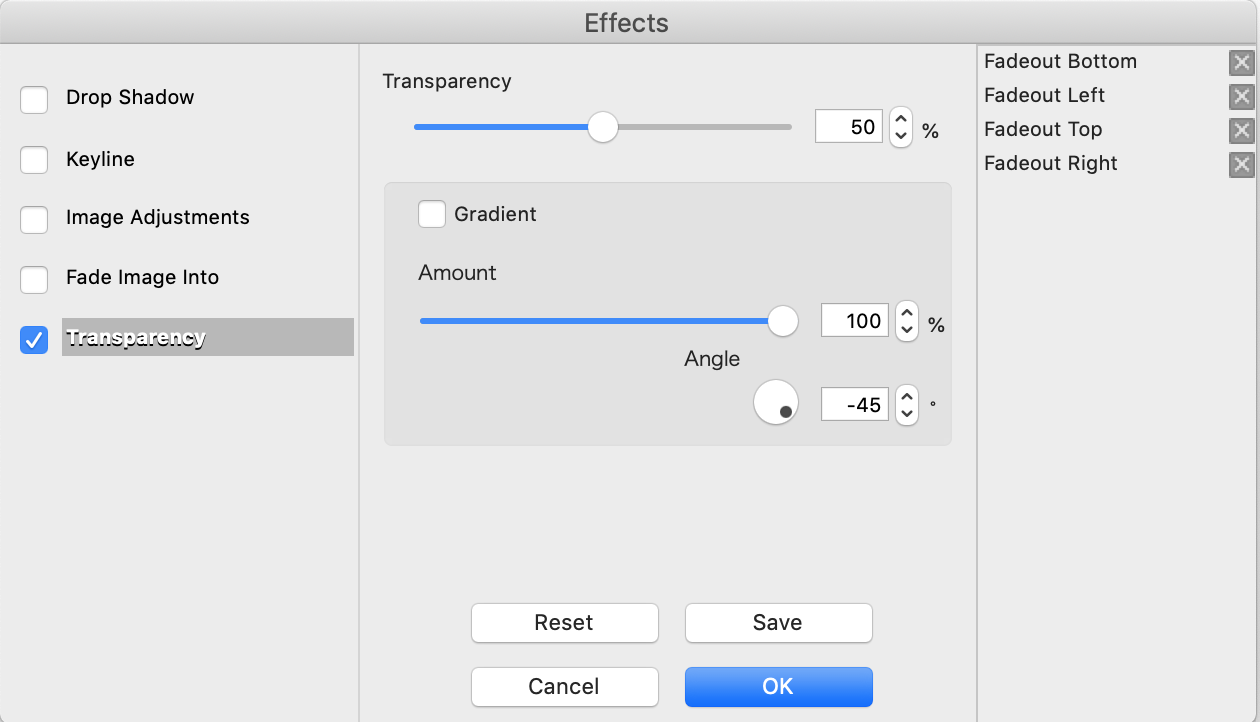
TRANSPARENCY
Adjust the transparency of an image and angle of gradient. You may also use the preset options or save your own custom settings.
Open Effects Window - Method 1
Open Effects Window - Method 1
- Click on image to enhance.
- Click on Effects icon found at the center of the top menu bar.
- Right-click on image to enhance.
- Select Transparency.
- Select Options.
- Click on checkbox to preview Transparency effect.
- Choose from one of the presets or select custom settings.
- Click OK.
- Click on checkbox to preview Transparency effect.
- Choose from one of the presets or select custom settings.
- Click OK.
- Select image.
- Open Effects window via methods 1 or 2.
- Uncheck Transparency.
- Click OK.
- Choose custom settings.
- Click on Save button.
- Name preset.
- Click OK.
- Select effect type.
- Click on x icon to the right of the preset or custom setting.
- Click on Save to delete and accept changes.
TYPE
Add Copy
- Select the Type Tool on the Tools Bar.
- Click on the design canvas.
- Enter text.
- Change the font, size, color, position, angle, and formatting via the Basic Menu.
- Click away to place text.
- Select the Selection Tool from the Tools Bar.
- Select the text box to edit.
- Edit copy, font, size, color, position, angle, and formatting via the Basic Menu as needed.
- Click away to accept changes.
- Select the Selection Tool from the Tools Bar.
- Select the text box to move.
- Click, hold and drag to a new position, or use the XY coordinates via the Basic Menu.